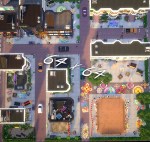
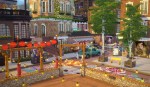
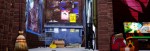
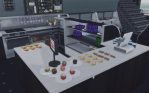
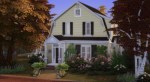
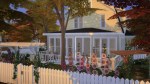
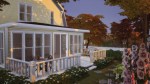
This is a lot and I apologize in advance. Get it? A lot, a lot of cc. A crappy pun to get us off on a great start lol I’ve wanted to do a city block for story telling for awhile, so here we are! There is quite a bit of residential space provided, as well as 2 parks, 11 fully furnished commercial spaces and some other quirky spots to explore. I hope you guys enjoy it!
64 x 64 lot, replaces Myshuno Meadows in game.
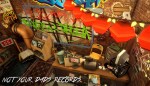
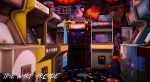
Commercial lots: Time warp arcades, Not your dads record shop, MX underground, Lil shop of cowplants, Scarlet’s hideaway, Bad habits tattoo, But first coffee shop, At your earliest convenience store, Restaurant, Laundry mat, and One bougie retail store.
Packs used: City living, Get to work, Get together, Cats and dogs, Seasons, Outdoor retreat, Dine out, Vampires, Spa day, Parenthood, Kitchen stuff, Romantic garden stuff, Spooky stuff, Backyard stuff, Kids room stuff, Bowling stuff, Movie hangout stuff, Perfect patio stuff.
You will want to make sure move objects is on just in case.
I tried to keep things organized, if you’ve downloaded other’s builds you might already have a large portion of it. My cc is already included.
Also I want to thank the creators that were really kind and let me include their cc. With there being so much linked already I appreciate them so much for making the process a little easier.
This is my absolute favorite skin overlay for girls in the history of ever, I use it for Sabrina, Reagan, and Maggie. But in general, I use Pralinesims’ Hydra and Lumi skins for both females and males almost exclusively!
Sims will get paid to go on Sugar-dates! Your sims will be paid for their time and affection! Sims will also be able to make money by asking the Sugar-host for money which is located in the Sugarhost menu. When you ask for money you will be given a certain amount based on your sugar-dating skill. The higher your Sugar-dating skill is the more money you will get from asking. You can gain the Sugar-dating skill by asking for money or going on Sugar-dates!
How does it work? This is a social event so you can start the event whenever you want to or even schedule your dates (seasons required) on the calendar to work! This is also perfect for story telling.
Non Goaled Event Payments Minimum: $5 Maximum: Unlimited If you want to do the event non goaled you can kiss up to your host and keep asking for money. The amount of money you make depends on your Sugardating skill level.
Known glitches I have no idea if these glitches come from mods or the game itself but all of my events are codded correctly so here are the known glitches: – Sometimes goals go missing – Generic lots won’t show up – Sometimes you won’t get the reward (I will find a way to add a backup payment method because this makes the job mods useless if you are doing them for money.)
How to start job Use the phone and click plan a social event. You can even click on the calendar to schedule days to have Sugardates!
Requires: Base game (Seasons is only required for scheduling events on the calendar!)
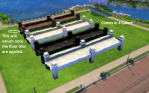
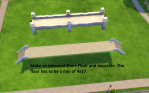
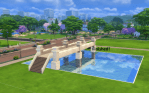
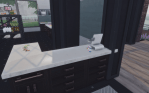
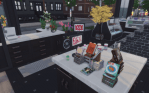
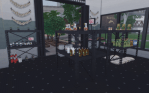
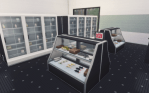
A cc free grocery/market type lot built for my Community Build Challenge save. I’m gonna level with you guys -This lot is odd gameplay wise – a lot of stuff can’t be set for sale and sometimes the debug items show, sometimes they don’t (make sure to have all the required cheats enabled!). Mostly I built and am sharing it cause I really wanted a cc free market lot so my sims can go “shopping” for groceries and whatnot without having to load up on too much cc. There are some empty spaces here and there to add things you may want to sell or buy. Anyway here’s the fine details…
CC Free
30×30 Lot
bb.showhiddenobjects
bb.moveobjects on
You can grab it HERE via sfs or under my gallery user lenei14.
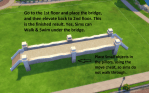
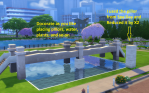
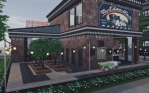
*built on 30×20 lot Sporting Space in Brindleton Bay*
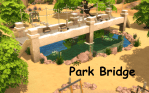
Thank you all CC creators! Place using bb.moveobjects on. I used the following packs: Cats & Dogs, get Together, Vampires, Outdoor Retreat, Backyard Stuff & Romantic Garden stuff.Download from the gallery (Origin ID: totschlagerobst)or from sfs link below:
I created my first set of CC and it’s a variety of
Sheba cat food which can be found in the clutter section. Or just type
in CoatiSims to find my content in the game 🙂
I’ll
upload more sets in the future and I’ll probably do these brand by brand
so there is a nice mix of everything in each set 🙂
If you are
having trouble placing some of these, I can highly recommend this
article which shows you more placing possibilities / how to resize objects / etc.
Please feel free to tag me in your pictures using the CC 🙂
Sooo since there was a much better reception for my editing tips post, I feel less awkward trying to put this one together. I’d still like to be able to do actual video tutorials, but it’s something I’m still struggling with, tbh, so here’s this instead (rather than having nothing at all).
This tutorial does require having a graphics tablet. I know this isn’t as accessible to everyone, but I have absolutely no clue how to achieve this or even a similar look without it.
There is no exact science to how I edit my screenshots, tbh, but there is a general work flow I go through that has developed over the past year or so of me doing these.
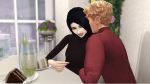
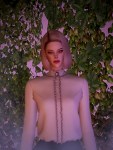
The hair can be broken down into 3 steps: color blocking, shaping, and minute details. It is essentially going form the largest details down to the smallest. And I generally use the shape already given by the base hair. I tend to start on this after I’ve done all the initial prep work: cutting the sim out from the background, cleaning up the edges, stuff like that. So. I’ll be using this hair as an example:
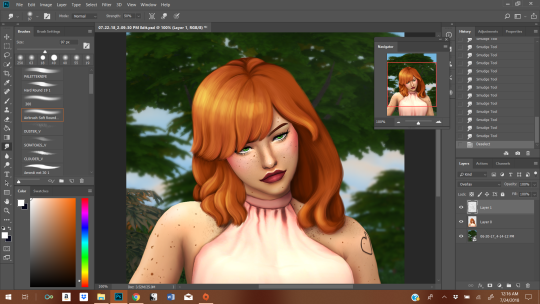
1. Blocking/Giving Yourself A Base
First, give yourself a new layer. This makes it easier to basically trace what’s already there (it’s your guide tool), and making mistakes isn’t as big of a deal.
I take the eyedropper tool. You want to find a medium shade in what your base screenshot already gives you and then also a darker shade (but not the darkest). Then, you paint that medium shade all over most of the hair. I take the darker shade and paint over the sections of hair that are obviously in shadow (usually what sits closest to the neck; I do it for depth perception).
2. Adding Shape + Direction
Here you use the darker shade to outline where there are chunks of hair. To make it really easy, make the layer you’re working on about 50% opacity and just trace the base screenshot.
Where the hair is lighter + darker is influenced by where your light sources are. My light source here is in the top left corner. The sun, basically.
I’m always swiping my brush in a downwards motion, following the flow of the hair. That’s pretty important, imo, to getting hair to look like hair. You gotta feel it.
3. Adding Additional Shape and Direction
More of the same. We’re starting with the large, blob block of color and building up the details from largest to smallest, always in that order.
With the third step, we start using progressive lighter (I move diagonally on the color box, not straight up) and darker oranges in order to produce a more 3D effect. If you’re confused about the colors, just pick them with the eyedropper tool.
I haven’t changes brushes once yet, btw.
This is what the hair looks like after I’ve worked my way from step 1 to 3.
For the final stretch, I switch to a hard brush and conservatively apply it in the ends (to give the impression of individual hairs) in the darkest shadows and in the lightest highlights. It’s difficult to gauge and easy to go overboard, so you might be undo-ing a lot of your mistakes until it looks the way you want it too.
The idea here isn’t to draw a bunch of individual strands of hair. We’re going for a more “maxis-match” feel, so we want to retain the cartoon chunks rather than opting for a more realistic style.
3.5 Note on Hue/Saturation
I’ve had edits before where the colors choices I made were not quite what I was hoping for, so to tweak the undertones a little, I go into hue/saturation (I’ve done it with color balance, too). To do this without messing up the rest of your screenshot, I make the other layers invisible first, and then make adjustments as I see fit. You will have to merge it down before you make the other layers visible, though, or the adjustments will affect them, too. If you don’t like how the adjustment looks, just undo the merge and readjust until you like it.
Be careful not to go too wild with this, though. It’ll “fry” the texture if you do, and you’ll need to lightly go through steps 2-3 in order to re-achieve the softer look again.
4. More Highlights + Shadows
Once steps 1-3 are done, I move on to the skin + clothes. It’s only after the rest of the screenshot is touched up that I move on to adding highlights + shadow to create more depth. I went over my process here, and it extends to the hair as well. Dark navy + white (or basically white), with a soft brush at about 50% opacity. This is less about shape and more about adhering to where the shadows and highlights fall on the hair. I opted for an “anime” highlight on the hair.
And that’s how I do it. Hope it was helpful. I know people are curious as to my process.